Inviting a New User
Expanding your team in AI Loop is a straightforward process handled by administrators. This guide walks you through sending an invitation, managing the approval process, and understanding user roles.Admin Permission Required: Only users with the Admin role can invite new members and manage user permissions.
Invitation Steps
Follow these steps to add a new member to your workspace.1
Navigate to Permissions
Navigate to the Settings page and click on Membership & Permissions.
2
Open the Invitation Form
Click the “Invite New User” button to open the invitation modal.
3
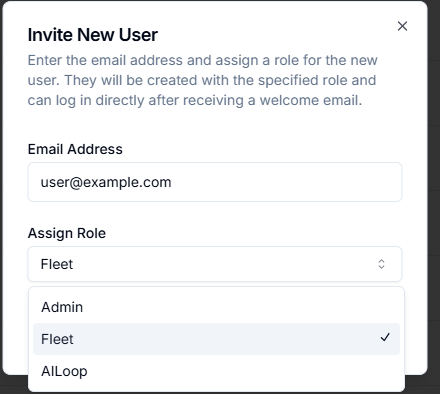
Enter Details and Assign a Role
Enter the new user’s email address and select their role from the dropdown menu (e.g., Admin, AILoop, Fleet).
4
Send the Invitation
Click “Send Invitation”. An email will be sent to the user with a login link, and their account will be created in a pending state.
Managing Pending Requests
For security, new accounts require an administrator’s approval before the user can log in. This section explains the process from both the administrator’s and the new user’s perspectives.The New User’s View
If a user attempts to log in before an administrator has approved their account, they will see a screen indicating that their account is pending approval.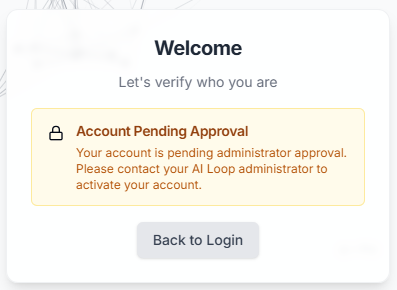
Administrator’s Approval View
When a new user is invited, administrators will see a notification on their dashboard. The Login Requests tab will indicate the number of pending approvals with a red badge.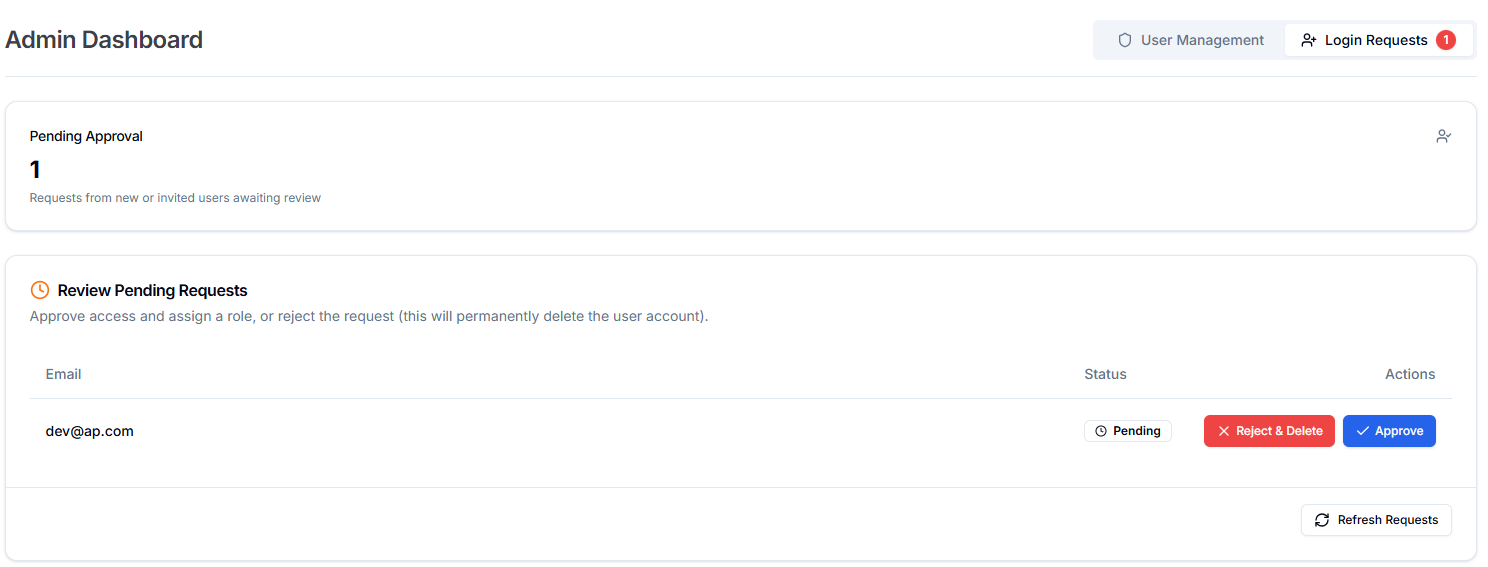
- Approve: This action grants the user access to the platform with roles, allowing them to log in.
- Reject & Delete: This action denies the request and permanently deletes the user’s pending account.